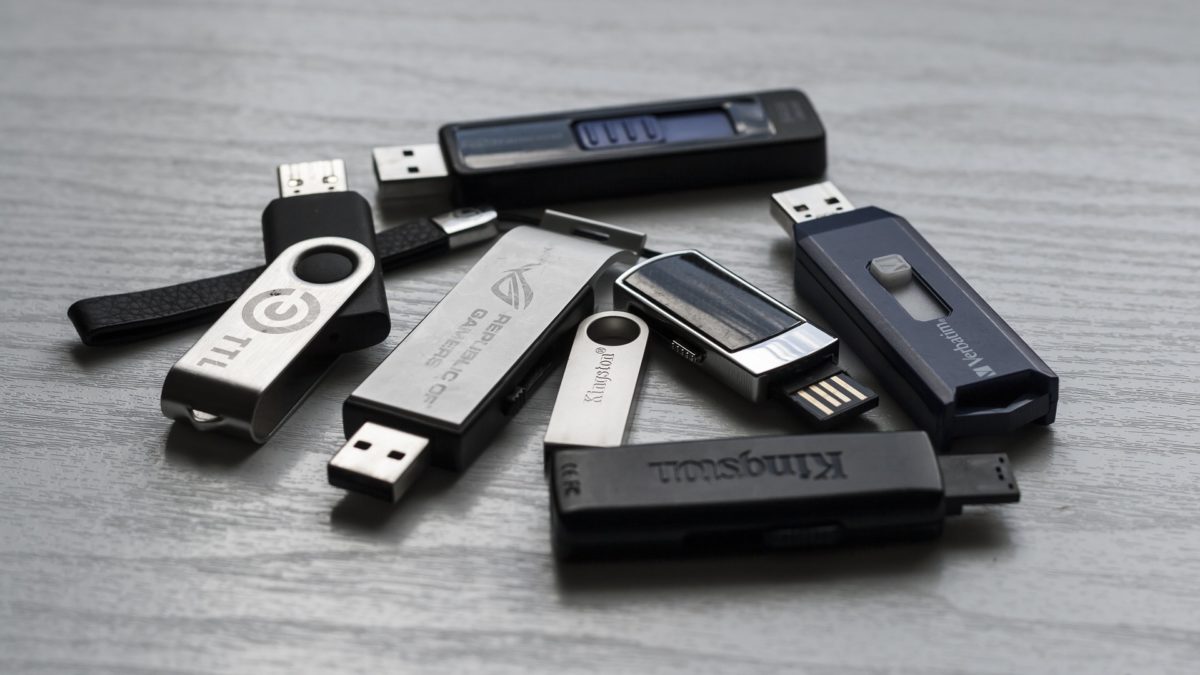
Microsoft Defender for Endpoint contains multiple protections layers like EDR, ASR, Network Protection, and many more. Protecting against unwanted devices is important. For example; monitoring storage devices and blocking external storage devices for restricting users to copy corporate files or launch unwanted software/malicious files.
What is Microsoft Defender for Endpoint device control?
Microsoft Defender for Endpoint device control protects against data loss and gives visibility in external media used by the organization. For each organization, it is important to track removable storage devices and USB drives to protect against data loss. Microsoft Defender for Endpoint has a nice feature to protect against data loss and gives insights.
Device controls make it possible to enable layered protection to secure removable hardware. For example – it is possible to block completely the usage of removable storage or block/allow specific hardware.
Requirements
For using Device Control make sure the following prerequisite are in place:
- Configured Microsoft Defender for Endpoint
- Configured Endpoint Manager for managing the settings
- Microsoft 365 E3 for protection options
- Microsoft 365 E5 license for detect and respond
In this blog the usage of the Endpoint Manager policies and reporting options in Defender for Endpoint.
Configuring Device Control – Block removable storage / write actions
Multiple policies and options are available for Device Control. When looking at the configuration of the device control settings, most of the settings are straightforward to configure. Most of the settings are part of the attack surface reduction policy. Let start with blocking removable storage.
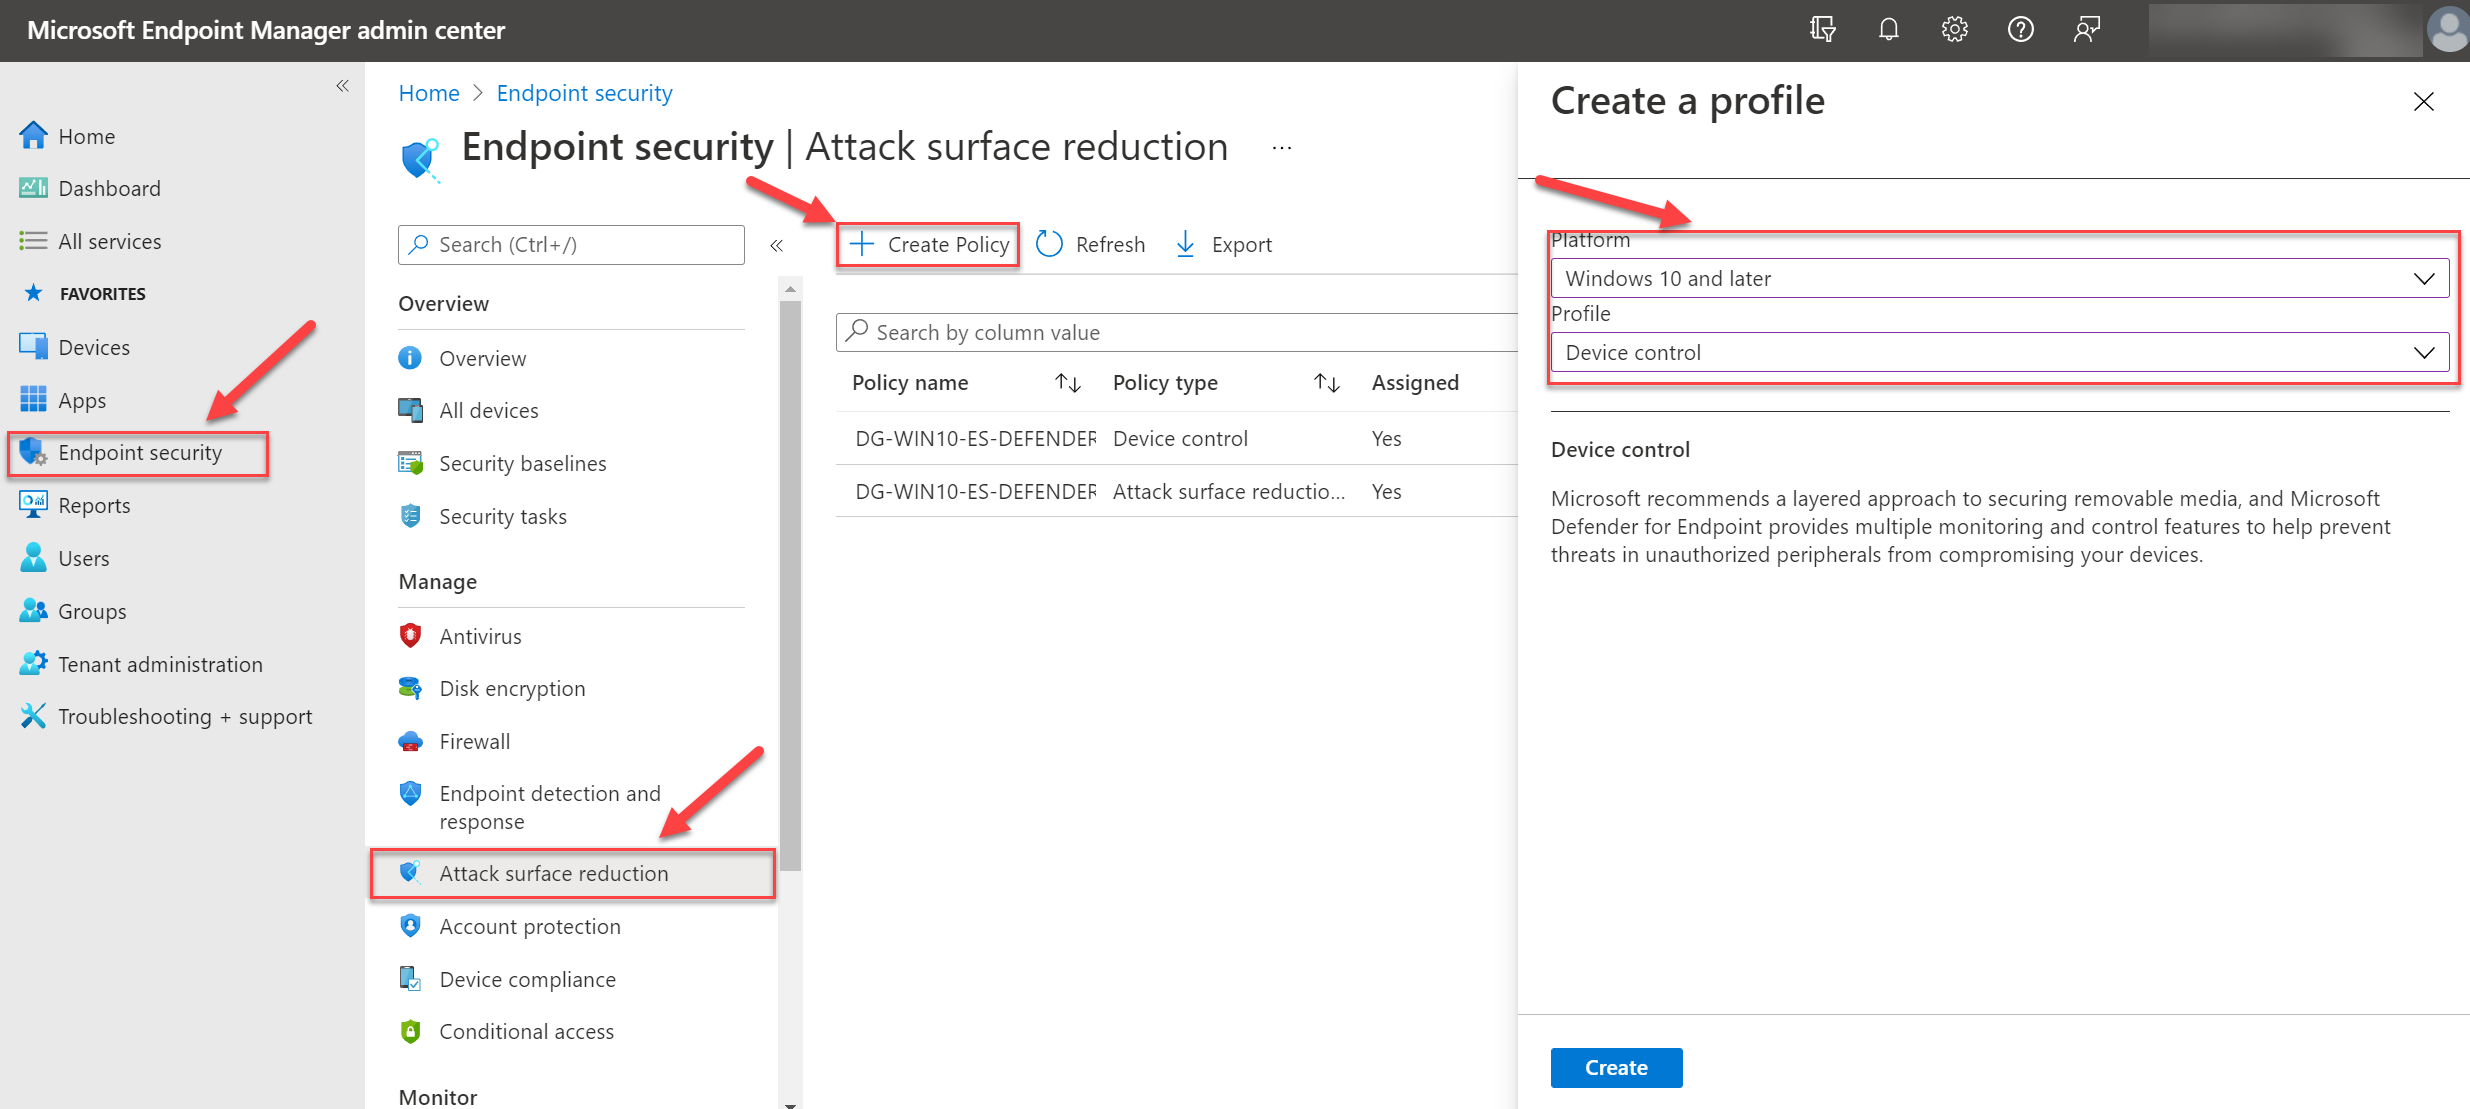
- Open the Microsoft Endpoint Manager admin center portal and navigate to the page Endpoint Security -> Attack Surface Reduction
- Click on Create Policy
- Configure the platform with the value; Windows 10 and later. For the profile select Device control
- Fill in the required name and optional description

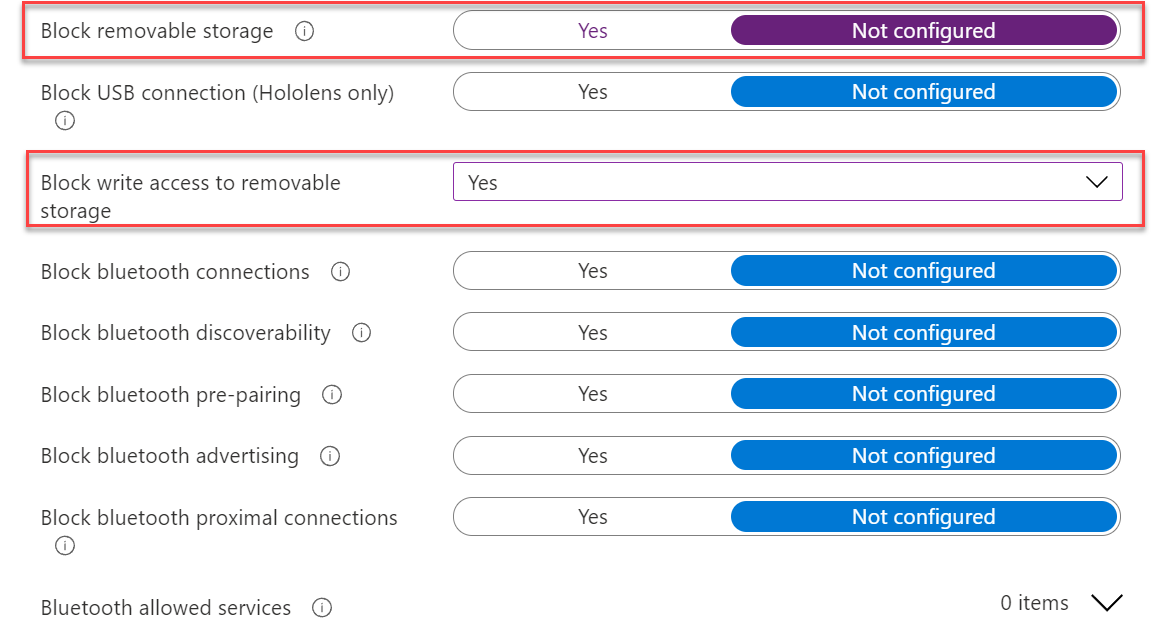
5. Configure the setting Block removable storage with the value Yes.

The block removable storage policy blocks the usage of removable storage and will set the setting: RemovableDiskDenyWriteAccess. Policy is supported for Windows 10/11 Pro, Business, Enterprise and Education.
Result: Removable storage
Once the policy applies to the machine, the removable storage must be blocked on the device. The end-user will get the notification: Location is not available – [drive letter] is not accessible – Access is denied.

Easy to enable and configure. Later in this blog the report part with Microsoft Defender for Endpoint for removable storage devices.
Only block write access
The policy block removable storage will block the complete removable storage for reading/ writing. If needed you have the option to only block removable drives. For this situation configure the policy: Block write access to removable storage with the value Yes, and set block removable storage to not configured.
Once the policy applies to the machine, removable storage is allowed and each write action is blocked. The policy will set the setting: RemovableDiskDenyWriteAccess.

Blocking specific hardware
With the below settings is it possible to block hardware devices. Blocking specific hardware is possible with multiple settings and methods. Let’s explain: 
1: Allow/ block by device identifiers: This setting can be used to block/ allow specific devices that match a device identifier.
2: Allow/ block by setup class: This setting can be used to block/ allow specific devices that match a device setup class.
Example of system-defined device setup classes in the category USBDevice.
- Class = USBDevice
- ClassGuid = {88BAE032-5A81-49f0-BC3D-A4FF138216D6}
Source/ more information: Microsoft – System-Defined Device Setup Classes Available to Vendors
3: Allow/ block by device instance identifiers: This setting can be used to block/ allow specific devices that match a device instance identifier. A device instance ID is a system-supplied device identification string that uniquely identifies a PNP device in the system. The Plug and Play (PnP) manager assigns a device instance ID to each device node
For example, when you want to block the installation of all printers, you would find the ClassGUID for printers and add it to the block hardware device installation by setup classes policy. If you want to block a specific printer or device, you would add its hardware ID to the block hardware device installation by device identifiers policy.
Monitor Mass Storage with MDE
Microsoft Defender brings a default set of reports for device control. The report Device control brings useful details for admins to view the organization’s device control usage.
For opening the report; go to security.microsoft.com and click on the Report button. Now open under Endpoints the report Device control.

With the device control report, you can view events related to media usage, based on block and audit only events.
Do we need to configure audit-only reporting?
The audit event collection is enabled by default for devices onboarded to Microsoft Defender for Endpoint. There is no manual configuration needed for getting audit-only events.
Data in report
The first graph shows the general media usage for the organization. Visible in number count for; USB drive mount and unmount, removable storage access control, Plug and Play.

When clicking on the filter button multiple filtering options are available:
- Time range: Specifying time range
- Policy: Selec PnP audit, USB Mount Audit, USB Unmount Audit
- Media class name: Contains the class name ( USB, USB Device, USB Mount, Smart card readers, Disk drivers, Bluetooth devices, printers)
- Device ID: Filter for specific device ID
The details blade contain the following fields:
- Date
- Policy
- Media name ( name of the USB device)
- Media class name
- Device name
- User
- Device ID

When clicking on an event it shows directly a more advanced view with all the details. The event information shows more in-depth information for each specific event entry.
- Media name
- Class name
- Class GUID
- Device ID
- Vendor ID
- Volume
- Serial number
- Bus type
- Device name
- User
- MDE Device ID

With the button: Open Advanced hunting (1) it will open direct Advanced Hunting for showing all related events with a pre-build KQL query. Value (2) shows directly the latest found events in the past 30 days.

Sources
Microsoft: Defender for Endpoint Device Control Removable Storage Protection
Microsoft: Device control report
Microsoft: Device ID
Microsoft: Device Instance ID


Did Part 2 for this ever get published?
Hi Pete,
Not yet; part 2 is currently in the creating progress.
Explanation is part of the MDE series.
Hi Jeff,
Thanks for your time and efforts for writing the most hepful blogs on MDE and Intune.
I am trying to “Block removable storage” but I can’t find that option.
I believe that has been deprecated. Could you please confirm this?
Thanks again!